Light Box Graphics: UV Print on Acrylic or on Translucent Film
A light box, or cabinet sign, is only as good as its face. The cabinet and the lighting do their work out of sight; what people actually see is the printed graphics, by day with light falling on them and at night with light coming through them. Washed-out colour and soft edges make even a well-built cabinet look cheap.
There are two ways we put graphics on a light box face: UV printing directly on milky acrylic, or UV printing on translucent film that is then applied to the face. This guide explains how each works, where each one fits, and how to prepare a design that reads well in both daylight and darkness.
- Free site visit & measurement
- Design included
- 2-year warranty
- Own workshop in Calgary
How a Light Box Face Works
The face is the translucent front panel of the cabinet. We make it from 3 mm milky acrylic, which spreads the light of the LED modules inside into one smooth, even glow instead of a row of bright dots.
The graphics sit on that face and have to work in two very different conditions. In daylight, light falls on the front of the sign and people see the colours the way they see any printed surface. After dark, the light comes from behind, through the print, and the colours are seen as coloured light.
A good face looks right in both. That depends on the print method, on the design, and on how evenly the cabinet is lit, which is why we plan the lighting and the graphics together.
What UV Printing Is
UV printing cures the ink with ultraviolet light the moment it touches the material, so the colour bonds to the surface instead of soaking in or spreading. That is what gives clean edges on small text and solid, saturated colour on large areas.
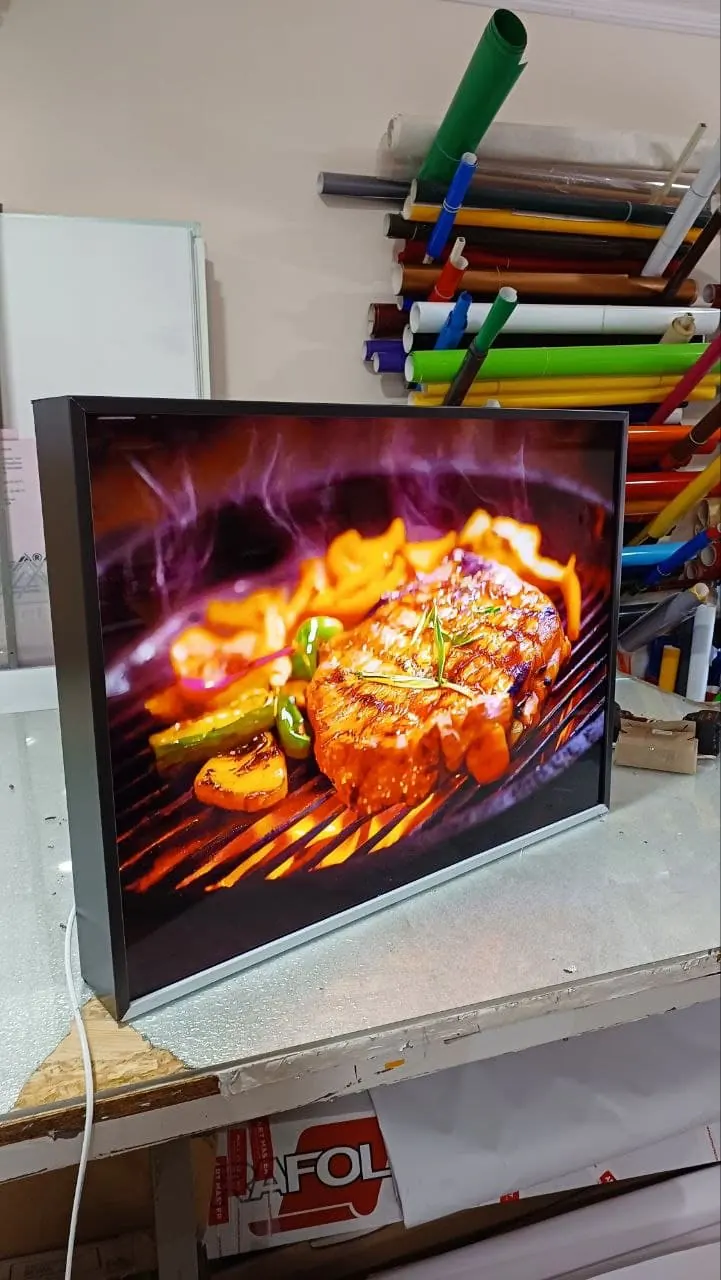
Professional UV printing reproduces detailed logos, gradients, photos and many colours in one pass, so a light box is not limited to a simple name: it can carry a menu or a photo of a dish. The graphics are designed for long-term outdoor use and improved resistance to fading.
Print on Acrylic vs Print on Film
Both methods are UV printing and both are used on light box faces. The difference is what the ink is printed on, and that decides what happens when the design changes later.
| UV print directly on milky acrylic | UV print on translucent film | |
|---|---|---|
| How it works | Ink is printed directly onto the surface of the acrylic face | Graphics are printed on film made for backlit signs, then applied to the face |
| Typical use | New light boxes and new faces | New graphics on a face that is still in good condition |
| When the design changes | A new printed face | The film graphics are replaced, the face stays |
| Look when lit | Even, vivid colour | Even, vivid colour |
Neither method is better in every case. On the site visit we look at the cabinet and the existing face and recommend the one that fits your sign.
Printing Directly on Milky Acrylic
When we build a new light box or make a new face for an old one, printing straight onto the acrylic is the natural choice. The face is cut to the size of the cabinet, printed, and fitted, with nothing applied on top.
- A new light box, where the face is made from scratch
- A worn face that is yellowed, cracked or brittle and has to be replaced anyway
- A design that will stay in place for a long time
When the branding changes later, the usual answer is a new printed face for the same cabinet. See light box face replacement.
Printing on Translucent Film
Film made for backlit signs lets light through and carries the print like the acrylic does. It is printed in the workshop and applied to the face, so the face itself does not have to be replaced.
- The existing face is clean, uncracked and still translucent
- Only the artwork changes: a rebrand, a new tenant or faded colours
- You want to keep the cost of the update as low as possible
Graphics on film are the usual way to do a graphics-only update. Removal and reinstallation of the face are included in the price. See sign graphics replacement.
Designing Graphics That Read Well When Lit
The print method is only half of the result. The other half is the design. A few rules make a light box clear from the street, day and night:
- Keep strong contrast between the text and the background, so the name does not blur at a distance
- Make the main text large enough for the distance it will be read from; the guide how to choose letter height gives the rule of thumb
- Remember that light areas of the face glow brightest at night, and dark areas let less light through
- A dark background with light lettering makes the lettering stand out after dark; a light background makes the whole face glow
- Put the essentials first: the name and what you do. Small extra lines are hard to read from a moving car
- Use your brand colour codes, so the print matches the rest of your branding
We lay out your graphics on the real size of the face, and you approve the design before anything is printed. Design is included in the price.
What We Need From You
Preparing the print file is part of our work. To get the design right the first time, it helps to have:
- Your logo in any format. SVG is preferred, but a picture is fine; we prepare the production file ourselves
- Brand colour codes (Pantone, CMYK or HEX), if you have them
- The exact text for the sign: name, services, phone or website
- A photo of the existing sign or the wall, by day and at night
Measurements are taken on the free site visit. The guide what logo files to send explains file formats in more detail.
From Design Concept to a Lit Face
The design concept shows your graphics at the real size of the face and on a photo of your building, so you can judge how the sign reads from the street before anything is printed. That is the moment to change sizes, colours or text: changes on screen cost nothing, while changes after printing mean a new print.
Look at the concept the way customers will see the sign: from across the road, from the parking lot and from a car going past. If the name is not clear at that distance in the concept, it will not become clearer once the sign is lit.
A new printed face or new graphics are made in our Calgary workshop in about two weeks after the details are confirmed. Before installation, every face is checked lit, so the colours and the evenness of the light are confirmed on the bench.
If the light inside your cabinet is dim or patchy, new graphics will not fix it. In that case we can replace the LED lighting in the same cabinet as well, and removal and reinstallation are still included. The light box page lists everything that can be renewed in an old cabinet.
Light Box Graphics Questions
UV-printed graphics are designed for long-term outdoor use and improved resistance to fading.
Yes. UV printing reproduces logos, gradients, photos and multiple colours, and keeps the colours rich when lit.
New graphics on an existing face are usually the most economical update, because the face stays. A new face makes sense when the old one is yellowed or cracked.
Lit colours always look a little different from the same colours in daylight. Print made for backlit use keeps them close to your brand, and you approve the design before anything is printed.
Yes. Layout, colours and text are adjusted before printing, and nothing is printed until you approve the final version.
Yes. For a new face or new graphics we measure your existing cabinet and print to fit it.
Any format works; SVG is preferred. If you only have an image, we prepare the print file for you.
Sources
- Creon Design: light boxes (cabinet signs), faces and printing, accessed 2026-10-30